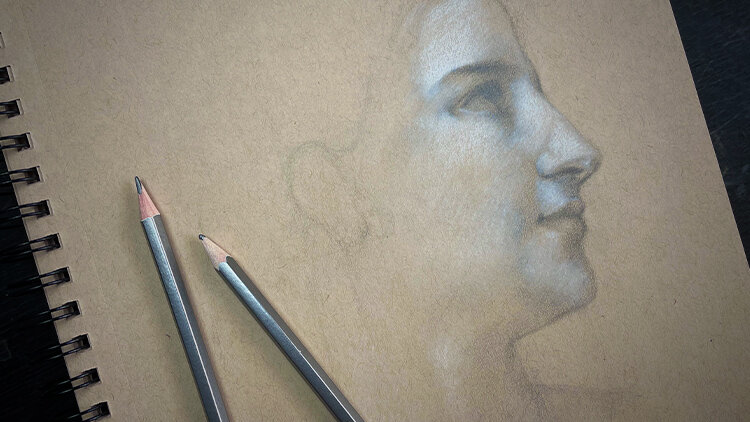
6 Methods for Starting Portrait Drawings
You start drawing a portrait full of excitement but halfway through the process something feels off.
The proportions seem weird, the eyes don’t align, and no matter how much you try to fix it, you can’t capture the likeness. You erase, redraw, and eventually, frustration takes over.
This struggle happens to beginners and experienced artists alike.
Without a clear starting method, it’s easy to get lost in the details or make errors that throw off your entire drawing. The result?
Hours of effort with a portrait that just doesn’t look right.
The solution is starting with a solid and precise foundation for your portrait drawing.
The cool thing is: there’s no one right way to begin a portrait. Today I’ll share six methods you can use to create a strong foundation.
Whether you prefer structure, intuition, or precision, these techniques will help you start with confidence and build a portrait that actually looks like your subject.
Let’s get into the methods.
Method #01 - Loomis Method
Start out with a simple circle drawn loosely. Next determine the midpoint of the face with a vertical line coming off the circle.
This will depend on which way your portrait or reference is facing. From these simple shapes and lines, we can start building out the rest of the features using simple lines and dashes at first.
The reason to use only lines for features at this point is because we are still determining the placement of them. It'll be much easier to move a few lines rather than moving an entire eye.
Even if you draw something well, but it's in the wrong spot - then it doesn't do any good to have it in the drawing.
Focus on placement and proportions of the facial features.
Method #02 - Straight-Line Block-In
For this method, we will only use straight lines for all the beginning, blocking-in stages.
Imagine your subject or reference with straight sticks place all around the outside edges of the head. We are going to interpret each curve as an angle or set of angles. I believe this method is much more accurate than drawing curves or contours.
It's much easier to judge the angle of straight line compared to a curve.
So once we have the large, outer shape blocked in, we can start moving to the interior of the face. This is where we will do the placement of the facial features.
Once again, only use straight lines for all of these as well. As the drawing progresses, all of these straight lines will naturally progress into curves.
Many straight lines placed onto of each other in a certain way can create curves. This is what we are trying to achieve with this method.
Method #03 - 3D Cube
Start out with a cube. If you're quite new to drawing, you may need to practice drawing cubes in all different orientations.
Fill up pages with nothing but cubes and have them facing all directions. If you're already confident about your cube drawing skills, then we can move on.
Draw a cube for your portrait or reference. This will depend on the direction your reference is facing. Make sure that the sides of the cube are matching up with head.
Two opposing sides of the cube should line up with the sides of the head. The other two opposing sides of the cube should be the face and back of the head.
From here, we can begin to carve out the shape of the head and determine a midpoint with a vertical line as well. This cube method can be useful for difficult perspectives like a 3/4 view.
Method #04 - Dots & Dashes
This method is a bit challenging and I don't exactly recommend it for beginners but it may be beneficial to at least be aware of this method.
Instead of drawing the outline of the head, ignore the head and start with the facial features.
Once you have the placement for the eyes, nose and mouth, then you can build the head around it.
It can be challenging to execute this one effectively but this one is helpful because you can measure the small distances between the facial features better.
The reason I don't recommend it for beginners is because they tend to draw the features too large and don't keep in mind the rest of the head for space on the page. It's a challenging method that can take time and practice to understand.
Method #05 - Grid Method
This method involves using a grid on your reference and also a similar grid on your paper.
This method allows you to focus and draw only one small square at a time, rather than being overwhelmed by the entire subject. This will allow you to draw more accurately and build a larger picture from small shapes and squares.
Be sure to draw this grid very lightly on your paper because as the drawing progresses, you will no longer need or want this grid on your paper. If you draw it lightly in the beginning it will be much easier to erase later on.
Experiment with different types of grids and sizes of the squares used. The larger the square you use, the less squares you'll have in your grid and the more challenging it will become.
Method #06 - Intuitive Drawing Method
The last method isn't really a method on its own. This is an intuitive method where you can combine any of the above methods and use a mixture of them.
So for example, I can combine Method #01 with Method #02. I can start out with a circle shape as a guide and just use mostly or only straight lines to build on the rest of the portrait. This would be a mixture of those two methods.
The possibilities are almost endless here and once you get comfortable with the way you draw, I recommend you give this intuitive method a try.
What I've realized is that every subject I draw is completely different.
Some subjects call for certain methods and other subjects need a different starting method. But it's also based on how I'm feeling about the subject or how I feel at that time of drawing.
Practice all of these methods many times and decide which one works best for your own process.
Drawing portraits is a difficult task but with practice, you will improve.
Don’t give up and do your best.
Thanks for reading.
— Brandon Schaefer
If you want to learn to draw but you’re not sure where to start, join the Intuitive Drawing Course:
Unleash Your Inner Artist
Draw with confidence and without fear! With the comprehensive curriculum, you'll have everything you need to achieve your drawing goals.
Sign up now and get instant access to the course materials and resources.
Intuitive Drawing Course - A Comprehensive Course for Beginners — Schaefer Fine Art

I am an artist, writer, and instructor. As a previous graphic designer for a healthcare management business, I now teach drawing, painting, and discovering your passion with art.
When You’re Ready, Here’s How I Can Help You:

Unlock your artistic potential and learn to draw with confidence using the Intuitive Drawing method. From your first sketch to creating realistic drawings and subjects.


