How to Sketch Simple Architecture in Pen & Ink
Nothing adds more contrast to your sketches than pen & ink.
But the problem is when you’re too afraid to try it because it’s permanent. And when you do try it, you’re so concerned with making mistakes that your linework turns out too stiff. There’s no life in your lines or your sketch.
Ink is meant to be expressive, loose, and full of life. The beauty lies in the mixture of precision and imperfections. The key is to trust the process and do your best every step of the way.
Let’s walk through how to draw a simple pen & ink sketch with confidence and enjoy the process without fear.
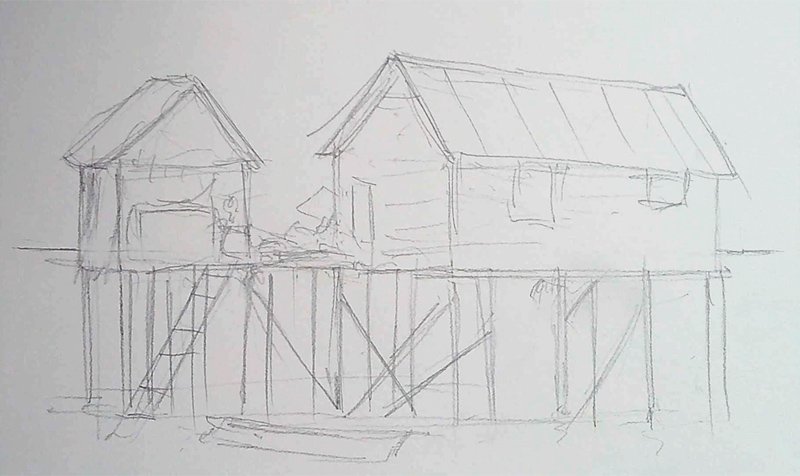
Step 1: The Foundation - Pencil Sketch
Start with a light, loose pencil sketch. The key here is to maintain accuracy without obsessing over perfection or details. Focus on the overall structure of the subject. Think big shapes first. Only move to small shapes after you’ve established the large ones.
Embrace the notion that your sketch is simply a sketch, nothing more.
Be sure to use a reference photo for your sketch (or draw from life if you’d like). I usually search sites like Unsplash or Pinterest for photos to draw from.
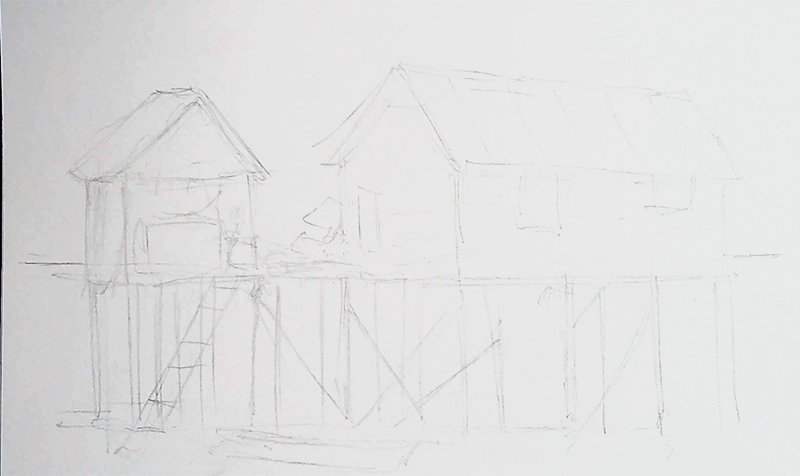
Step 2: Lightening Up with the Eraser
With your pencil sketch complete, it's time to lighten up the sketch a bit. If you have a kneaded eraser, form it into a cylinder between your hands by rolling it back and forth, and then gently roll it over your sketch many times.
If you only have a normal, rubber eraser, then gently erase some of the more harsh or dark lines you see.
This step grants you the freedom to wield your ink with confidence, as your pencil sketch transitions from a strict reference to a loose guide.
Step 3: Initial Ink Linework
The heart of your sketch lies in the ink linework. Don’t be intimidated by this step though.
Grab whatever ink pen you want for this initial linework. For this particular piece, I opted for a 2mm (02) Micron pen.
Be accurate, but remember to stay loose and maintain that sketchy charm. Your lines should exude confidence and limit excessive detailing. Straight lines usually have more character if they are a bit wonky and not perfectly straight. Embrace the imperfections!
Try drawing lines at different speeds. If you always draw slow and too careful, then try drawing some long, quick lines. Be brave and accept what happens. It will bring life to your sketch.

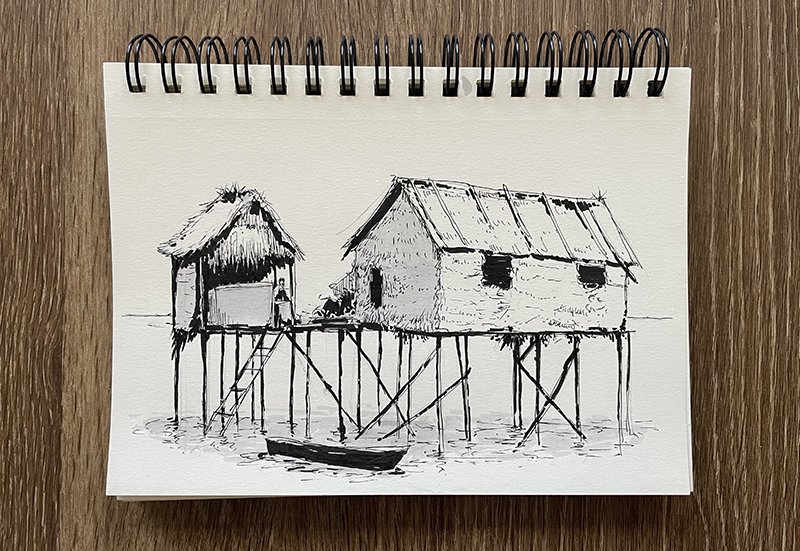
Step 4: Adding Depth & Contrast with a Brush Pen
Once your initial linework is drawn out, it’s time to add depth and contrast.
A brush pen is perfect for adding big areas of dark, dynamic contrast. (my favorite brush pens).
Simplify your image and fill in the shadows with big, bold strokes.
This is where your sketch truly comes to life. Don’t be afraid to go dark here because it’s these strong shadow shapes which will make your sketch feel more dimensional and expressive.

Step 5: Shaping Shadows with a Gray Marker
To enhance depth and dimension further, introduce a medium grey marker into the mix (such as Prismacolor, Copic, or Ecoline Brush Pens). I use the Ecoline Watercolor Brush Pens. Carefully shade in the larger shadowed areas, such as the left sides of buildings or beneath structures reflecting on water surfaces.
If you don’t have a grey marker, you can always use a regular ink pen (like the one you used for the linework) and create shadows using hatching or cross-hatching marks.
After this, to finish up the sketch, sprinkle in some more detail with your 02 Micron pen, but exercise restraint. The key is to think strategically about your focal point, ensuring that it remains the epicenter of intrigue and interest.
Add more detail around your focal point. Less detail everywhere else.

In all, this sketch took me about 45 minutes. The initial pencil sketch was 7-10 minutes.
The time doesn’t really matter. What matters is that you let go of perfection.
The goal with this sketch is pure expression, not perfection or details. The more you sketch, embrace the mistakes, and accept the outcome, the more confident you’ll become using pen & ink.
If you’ve been hesitant to try sketching with pen & ink, now is the time to give it a go.
Don’t overthink, just draw. Enjoy the process, don’t focus solely on the result.
This is the path to improving your ink sketches, one step at a time.
Thanks for reading.
— Brandon Schaefer
Unleash Your Inner Artist
Join my beginner-friendly drawing course today and start drawing without fear! With the comprehensive curriculum, you'll have everything you need to achieve your drawing goals.
Sign up now and get instant access to the course materials and resources.
Intuitive Drawing Course - A Comprehensive Course for Beginners — Schaefer Fine Art

I am an artist, writer, and instructor. As a previous graphic designer for a healthcare management business, I now teach drawing, painting, and discovering your passion with art.
When You’re Ready, Here’s How I Can Help You:

Unlock your artistic potential and learn to draw with confidence using the Intuitive Drawing method. From your first sketch to creating realistic drawings and subjects.